Locker Hooking Workshop: Online Guide

Hi there! Here's the online guide for the Locker Hooking using ANTHILL Fabric Scraps. Thank you for signing up to the online workshop! Below is the online guide, the rest of the guide will be available for you after the session. Hope you're excited!
Tap the FULLSCREEN icon on the video to view it better!
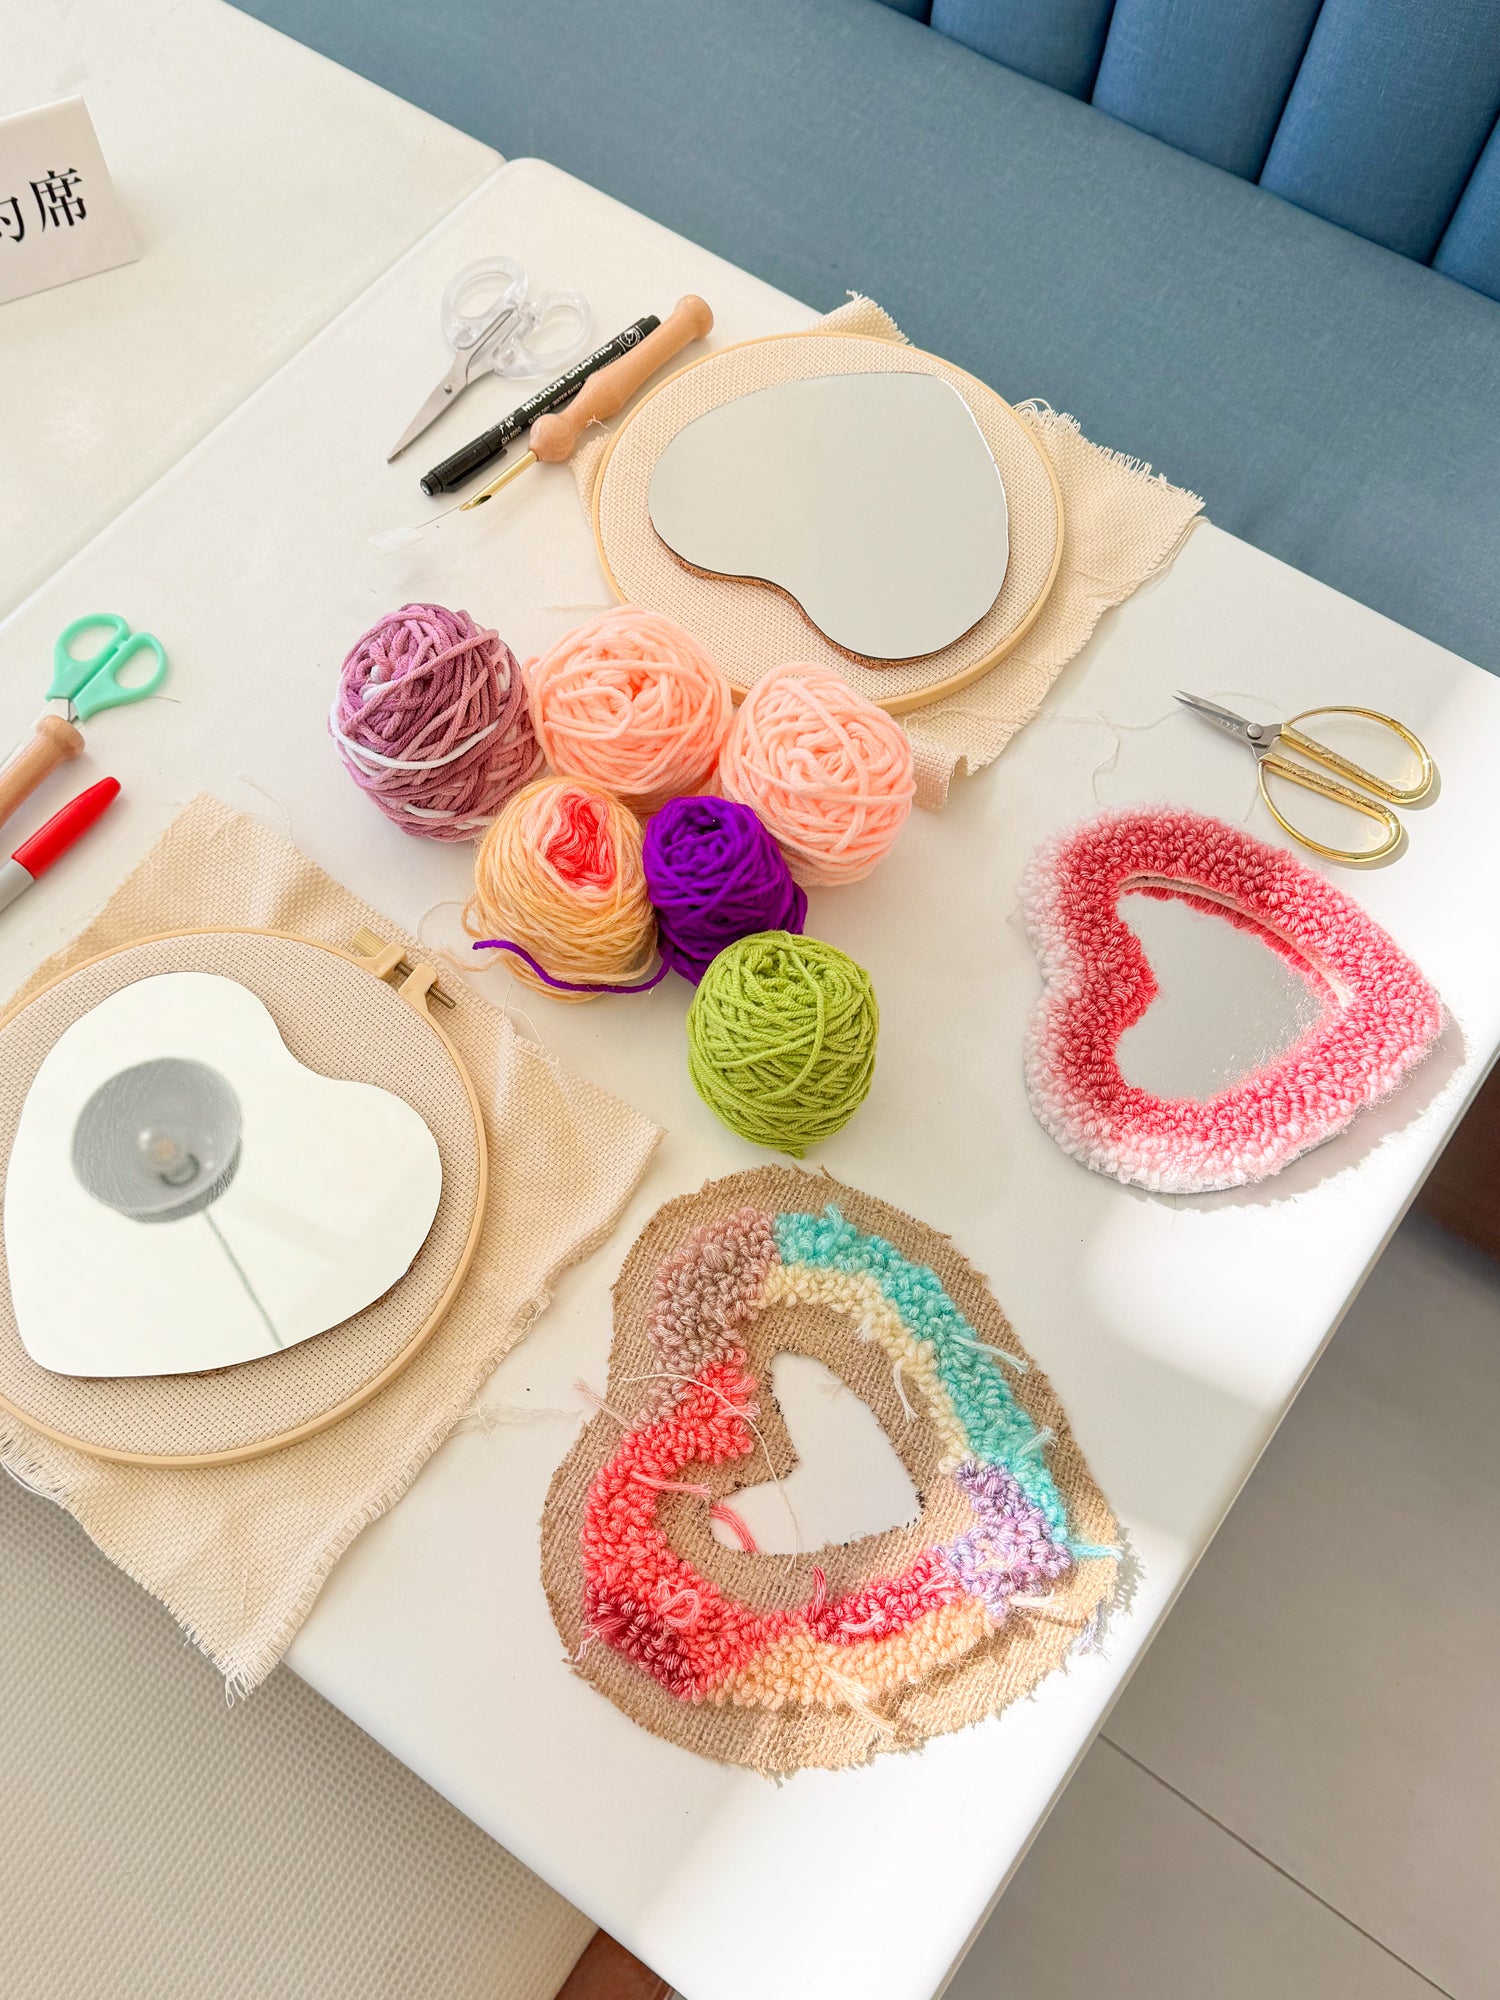
PART 1: READY YOUR YARNS
Make sure that your materials are ready, especially your yarns! Turn the hank yarns you receive from the kit into yarn bundles so you can easily use it. Believe me, this will save you from hours of untangling!
PART 2: CUTTING THE FABRIC
The highlight of our project is the use of handwoven fabric from ANTHILL FABRICS. It will take a lot of patience for some but I recommend doing this while watching or listening to something and you won't notice time passing.
- We recommend using a sharp pair of scissors to make the cutting easier.
- Ideal measurement for the width of the strips is 1-1.5 centimeters.
- Cut as much as you can & as many colors as you wish to use!
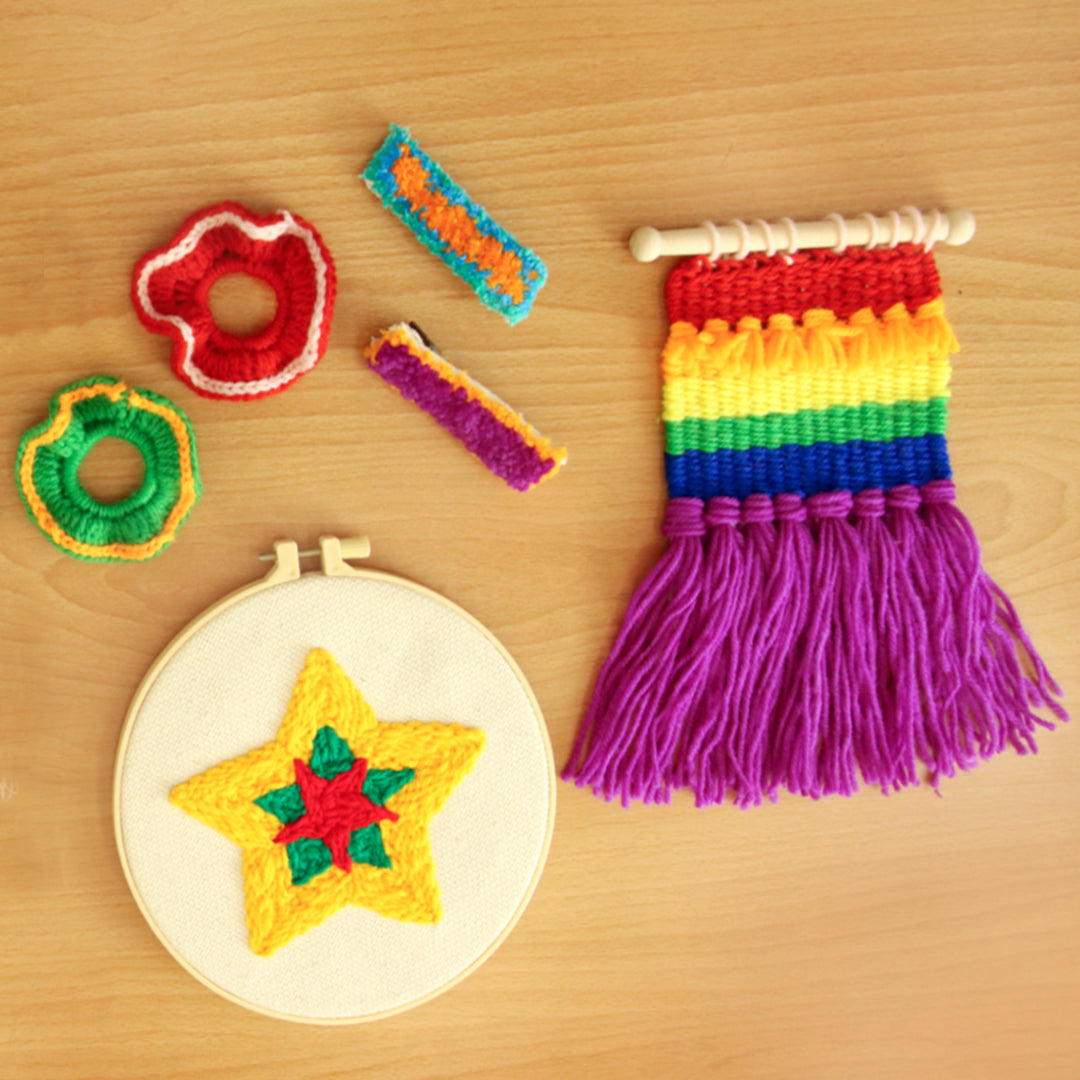
PROJECT SNEAK PEEK!
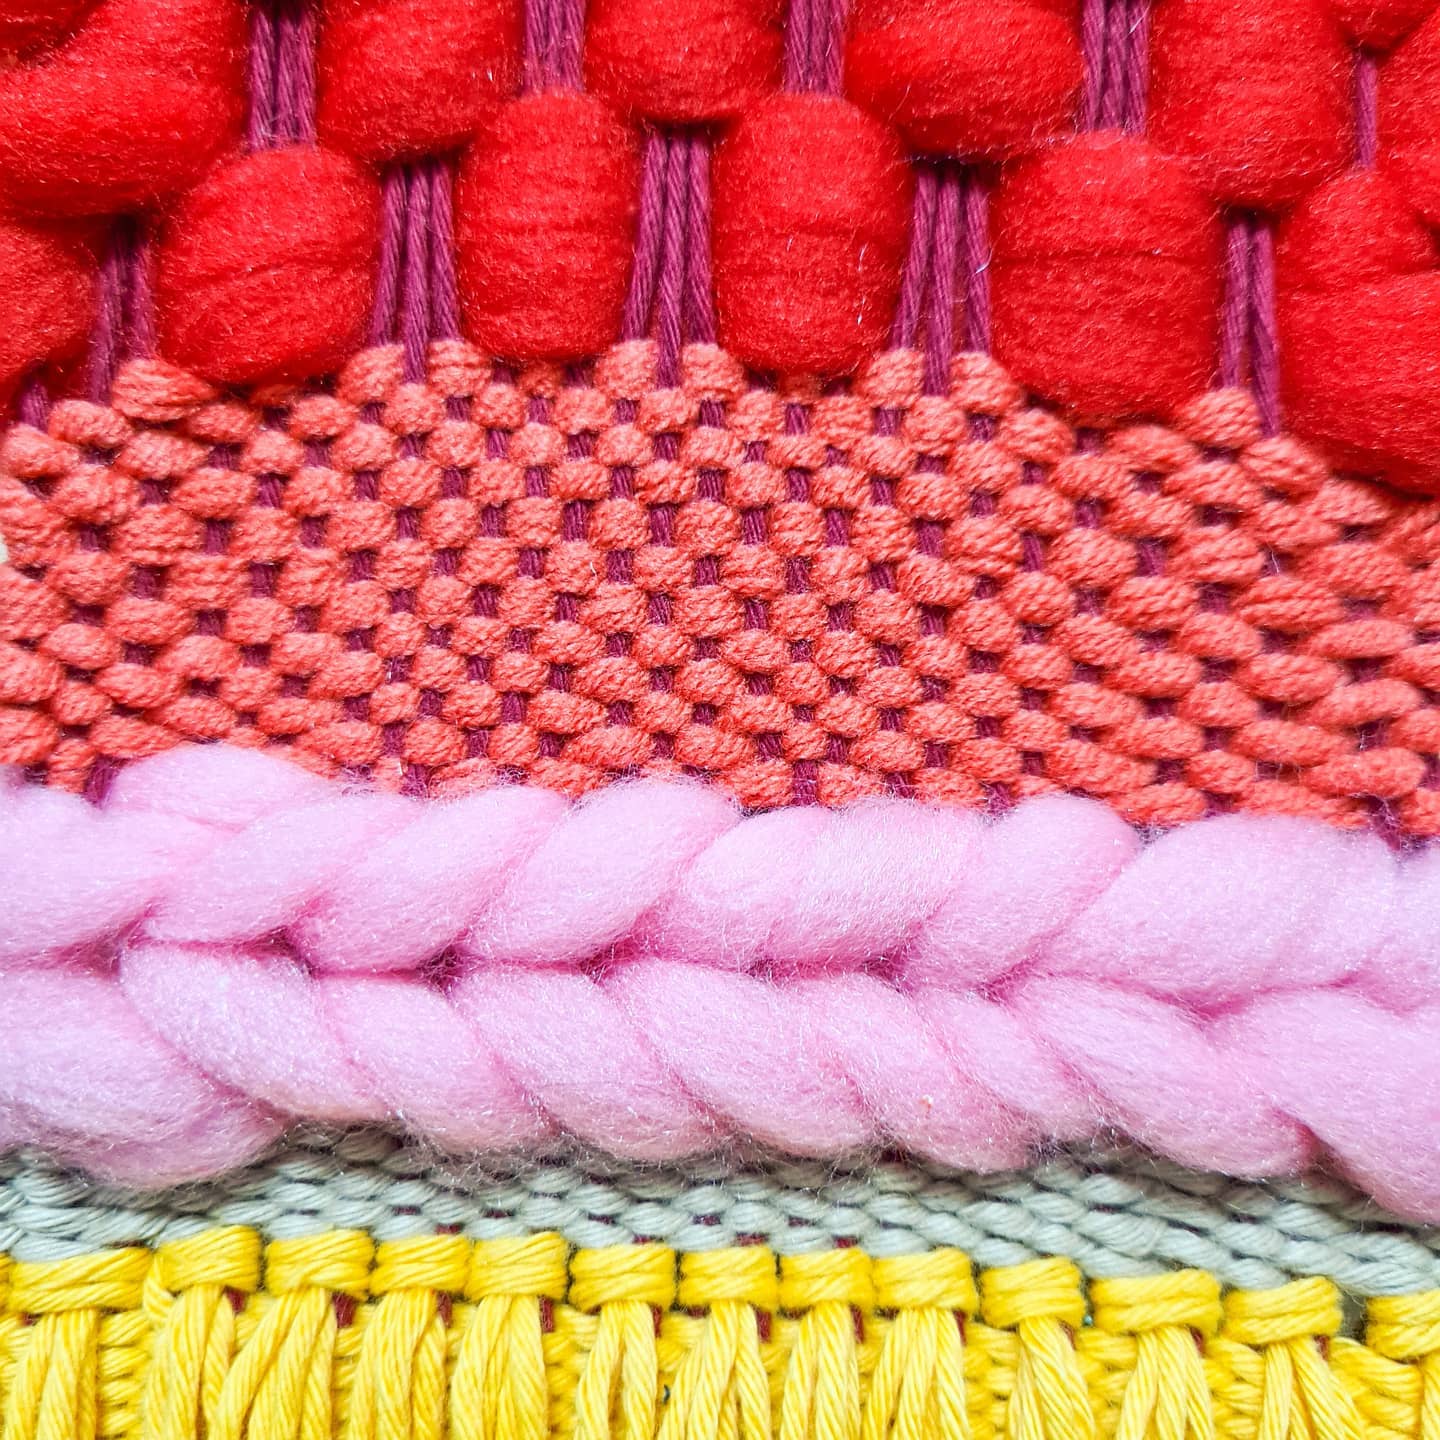
PART 3: THE LOCKER HOOKING TECHNIQUE
Now, we're ready to locker hook! In this tutorial you will learn how to hold the hook correctly, create a loop, and eventually fill up a row.
- The hook creates the loops of the fabric while the yarn secures the loops on the mesh grids.
- It's best to start the row from the RIGHT SIDE always. You'll have to turn your canvas when necessary.
- Keep your hook facing upwards so you can hook the fabric in.
- For bigger projects, leave at least two (2) rows of grids on all sides. For this bookmark-sized project, you can go ahead and fill up the whole space.
PART 4: CHANGING THE FABRIC
When you get to a point when you run out of fabric, here's how you can change or continue:
- Leave at least 1 inch of fabric tail underneath before starting a new color.
- You can choose to use the same color or explore another color combination!
- Same as how we started, just place your hook underneath and pull it up. Leave 1 inch of fabric tail as well, so it's sitting right next to your old fabric.
PART 5: CLEANING THE BACK SIDE
Like any other project, or yarn craft at least, we need to clean up the excess tails that we have made along the way. This will make sure the loops we have made will not fall off the mesh grids, aside from making both sides of your work pretty and neat!
- Use your big or small plastic needle for this step.
- Find the spaces you wish to hide your fabrics, ideally inside the loops. At least 2-3 loops works! Just try not to pull too much so you don't affect the front side.
- Insert your needle in these spaces before you insert your fabric or yarn inside the eye needle. Gently twist the needle as you pull.
PART 6: EDGING & FINISHING
We're almost done! Now we'll just have to add the finishing touch, the edging. This will help protect the stitches and keep the whole piece together.
- Insert your fabric in the eye of the needle.
- Push the needle in the corner grid of your piece, coming from underneath, and bring all the fabric up, leaving about 1-2cm of tail under.
- With the longer fabric in front, lay it over the next grid, then push the needle in again, coming from underneath.
Congratulations for finishing your first locker hooked piece! We hope that you enjoyed the process and that you'll be making more in the future! If you're looking to purchase additional supplies, tap the links below:
We hope to see your finished pieces! Please use the hashtag #PROUDWEAVECRAFTER and kindly tag us as well @theartofyarn and @anthillfabrics.
IMPORTANT: If you enjoyed the workshop or any of my online guides, please show your support by honoring my copyright over my creative work. If you made a project out of the lessons and patterns you learned and would like to sell it, you're welcome to do so (because you made it!) and I would love to help you share it! However, I would very much appreciate if you can send my way someone interested to learn this as well, instead of sharing them this guide. Thank you so much!
join the upcoming scheduled workshops
-
2024 Summer Workshops
Spend a meaningful back-to-back weekend learning something new with The Art of...
-
Weaving Workshops
Weaving is one of the oldest methods of fabric production and celebrated...