Weave-It-Yourself: Online Guide for Beginners
Welcome to weaving, modern maker!
Weaving is the traditional practice of interlacing threads to form a cloth. Modern Weaving, on the other hand, is the contemporary approach that plays with textures, techniques, and materials to creatively form a woven piece.
This short guide will introduce you to the foundation techniques of modern weaving to make your first woven piece! Make sure that all the materials are complete (you may refer to the content list on the back page). This Weave-It-Yourself kit is curated with materials that are best recommended for beginners.
Looking forward to your woven pieces soon. Enjoy!
Judith of theartofyarn.com
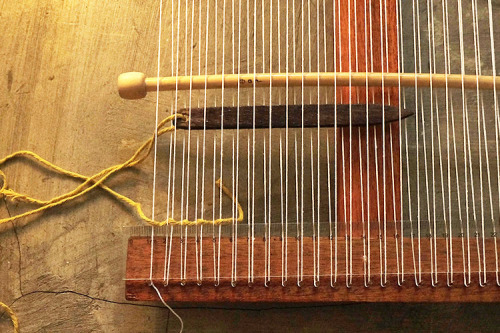
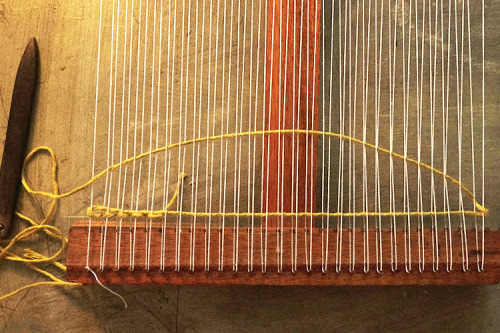
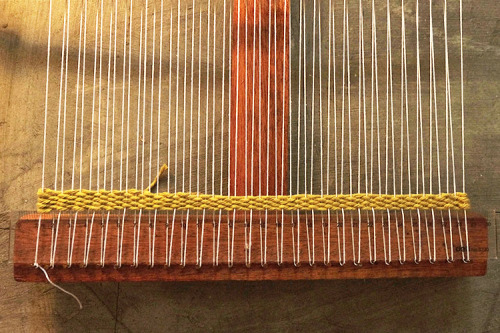
PLAIN WEAVE
The plain weave is the basic over-and-under technique. The stick serves as a guide for you to easily glide through your shuttle when you’re coming from the right. Repeat the key steps until you finish your yarn. Tuck your excess yarn underneath, leaving at least 2 inches of tail for finishing.
Key steps:
- First row coming from the right, insert your shuttle/needle right through the space opened by the stick.
- Second row: coming from the left, weave through the lower threads.

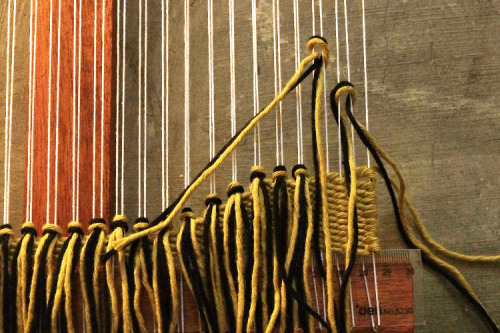
RYA KNOTS
The Rya knots appear as fringes and are usually added at the bottom area of a woven piece to add length, but it can be placed at any part of your project for additional texture. You may trim the length as needed and feel free to explore!
Key steps:
- Cut your yarns, get two (2) strands, fold them together in half, and hold them in the middle.
- Place the middle of the two (2) strands on top of your first two (2) warp threads.
- Insert each of the strands inside the gap between the two (2) warp threads.
- Hold it together and pull downwards.

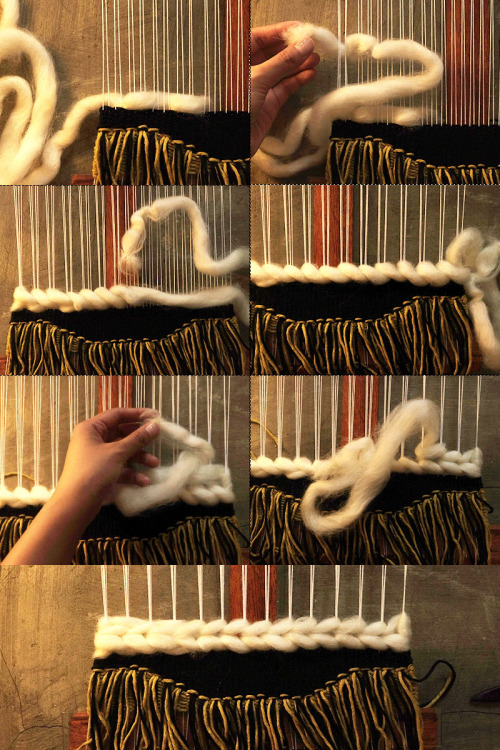
SOUMAK
Soumak is a technique composed of two (2) rows sitting on top of each other that creates a braid-like look and texture. This can be done using any type of yarn.
Key steps:
- Use one end of your yarn and wrap it underneath the first three (3) warp threads, from right going left. Gently pull with enough pressure.
- Continue wrapping three (3) warp threads at a time until you fill up a row.
- On your last group of warp threads, warp it TWICE.
- To make your second row, wrap the yarn underneath three (3) warp threads on top of your current row, this time coming from the left going right.
- Repeat the previous step until you finish the row. Tuck your ends underneath.
FINISHING
The easiest project to finish is a woven piece ready to hang on the wall! After filling up the space in your loom with the variety of techniques you’ve learned, it’s time to take it off the loom for finishing.
Key Steps:
- Carefully remove the warp threads from the nails, top and bottom.
- Tie the warp threads by using the overhand knot to secure your woven stitches.
- Flip your work. Sew in the excess threads using the needles in your kit.
- You may tie the warp threads on your stick or just simply insert it in and hang.
join the upcoming scheduled workshops
-

Yarn Explorations (2024)
Excited to be back for another round this year! I first offered...
-
Weaving Workshops
Weaving is one of the oldest methods of fabric production and celebrated...